
Loomly is the brainchild of Co-founders Thibaud Clement and Noemie Clement. Founded in 2015, the startup has moved its social media management application through a number of updates, each turning the application into a stronger and more versatile tool.
As the story goes, the Clements were two social media managers frustrated by broken workflows and applications that were supposed to solve the workflow issues, but only caused more challenges. So, they decided to build Loomly, a simple social media calendar.
Fast-forward a few years later, and Loomly has stayed true to its mission of making social media management a more structured and a less complex feat for social media managers.
Summary: Quick Jump Menu
Pricing
- Base - $35/mo, $26/yearly: 2 users, 10 social accounts, unlimited calendars, unlimited posts, unlimited file uploads, unlimited calendar templates, post ideas, live analysis, audience targeting, post preview, approval workflow, automated publishing, post sponsoring, ad budget cap ($500), interactions, basic analytics, online tutorials, support (FAQ, chat and email), payment by credit card.
- Standard - $79/mo, $59/yearly: 6 users, 20 social accounts, unlimited calendars, unlimited posts, unlimited file uploads, unlimited calendar templates, post ideas, live analysis, audience targeting, post preview, approval workflow, automated publishing, post sponsoring, ad budget cap ($1,000), interactions, basic analytics, advanced analytics, content exports, online tutorials, support (FAQ, chat and email), payment by credit card.
- Advanced - $172/mo, $129/yearly: 14 users, 35 social accounts, unlimited calendars, unlimited posts, unlimited file uploads, unlimited calendar templates, post ideas, live analysis, audience targeting, post preview, approval workflow, automated publishing, post sponsoring, ad budget cap ($2,000), interactions, basic analytics, advanced analytics, content exports, custom roles and workflows, online tutorials, support (FAQ, chat and email), payment by credit card.
- Premium - $359/mo, $269/yearly: 30 users, 50 social accounts, unlimited calendars, unlimited posts unlimited file uploads, unlimited calendar templates, post ideas, live analysis, audience targeting, post preview, approval workflow, automated publishing, post sponsoring, ad budget cap ($5,000), interactions, basic analytics, advanced analytics, content exports, custom roles and workflows, custom branding, support (FAQ, chat and email), payment by credit card.
- Enterprise - Contact for pricing: 31+ users, 51+ social accounts, unlimited calendars, unlimited posts unlimited file uploads, unlimited calendar templates, post ideas, live analysis, audience targeting, post preview, approval workflow, automated publishing, post sponsoring, ad budget cap ($10,000), interactions, basic analytics, advanced analytics, content exports, custom roles, custom branding, support via account manager, payment by credit card & wire transfer.
The Details
The first and most noticeable aspect of getting started in Loomly is that their interface is clean. They’ve done a great job of creating what can be best described as a user-friendly feel with the right amount of white space.
Launch Wizard
When you create an account, Loomly immediately takes the lead and initiates a guided tutorial. Unlike most, this is a wizard you want to pay attention to because it’s well-structured and very helpful.
Setting Calendar Details
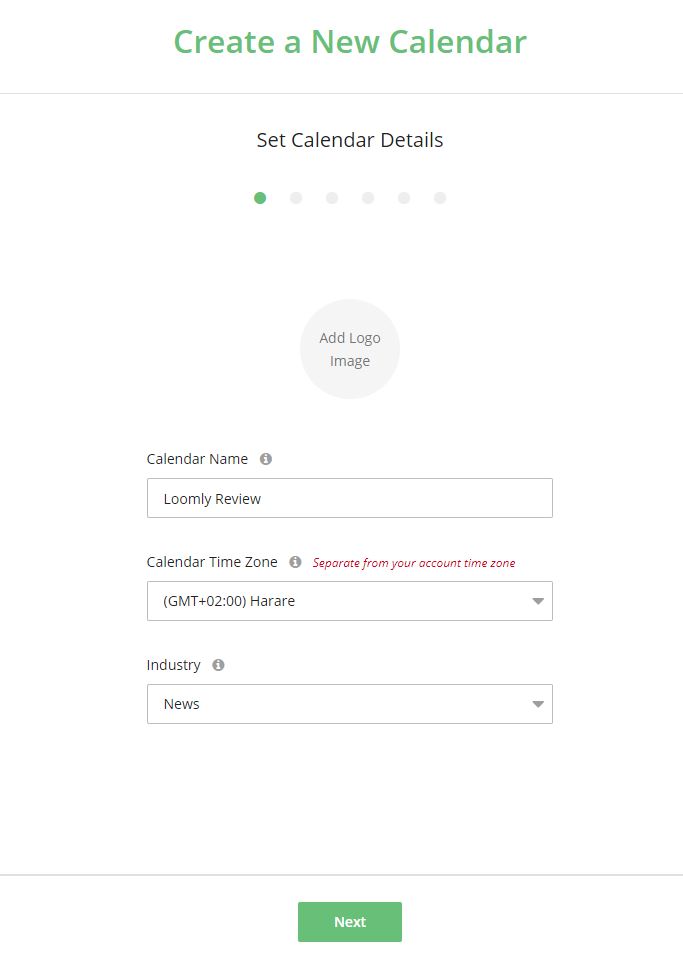
Before you know it, you’re creating your first calendar. Here, you’ll need to give your calendar a name, assign a timezone (not associated with your calendar itself or when posts will be published), and select the industry your new calendar will be associated with.
Connecting your Social Media Accounts
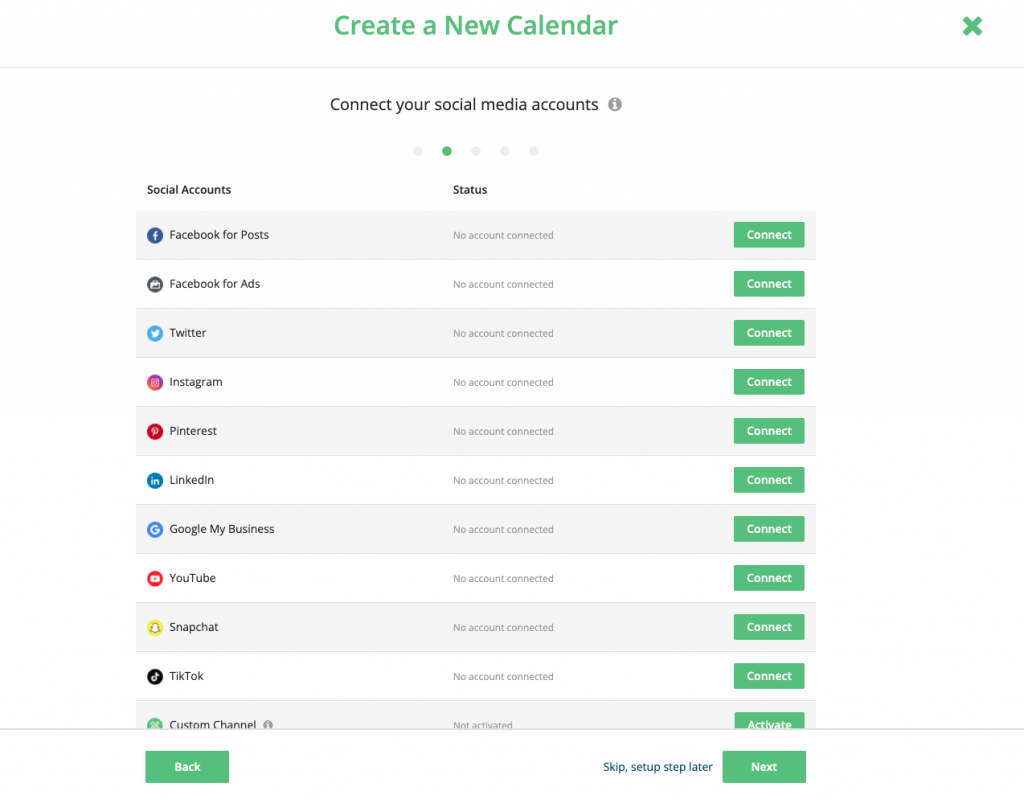
In a calendar, you can connect one account from each social media platform. Loomly supports Facebook, Instagram, LinkedIn, Pinterest, Google Business Profiles, Twitter, YouTube, TikTok, Snapchat, and custom channels.
If you want to connect multiple accounts from the same social media platform, you can create multiple calendars: in fact, you are free to create as many calendars as you need.
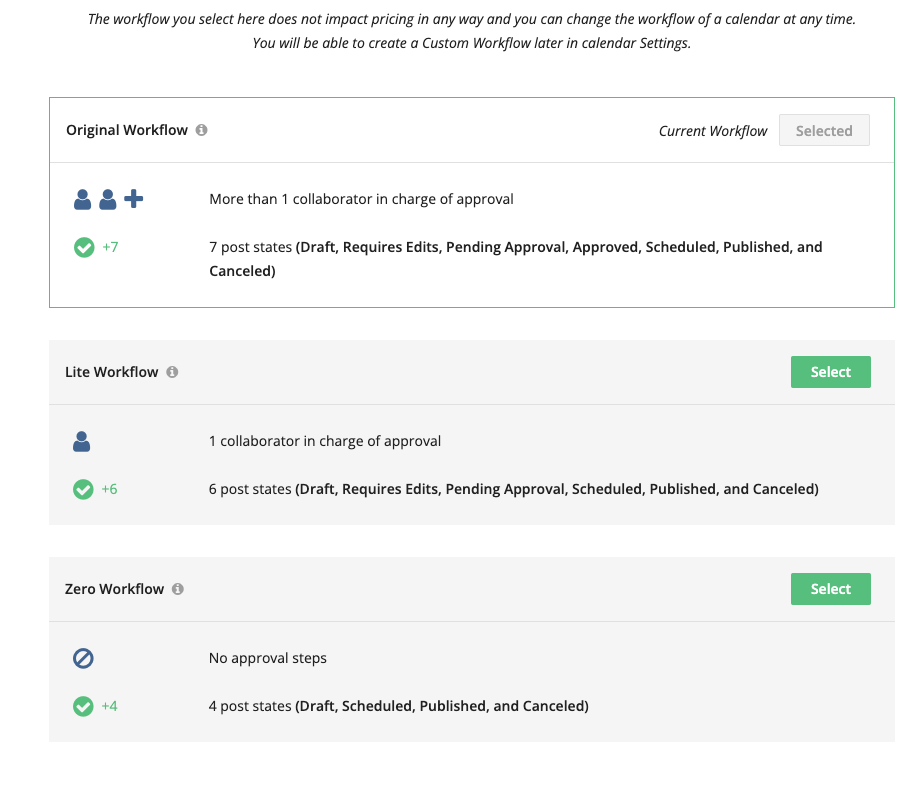
Set Calendar Workflows
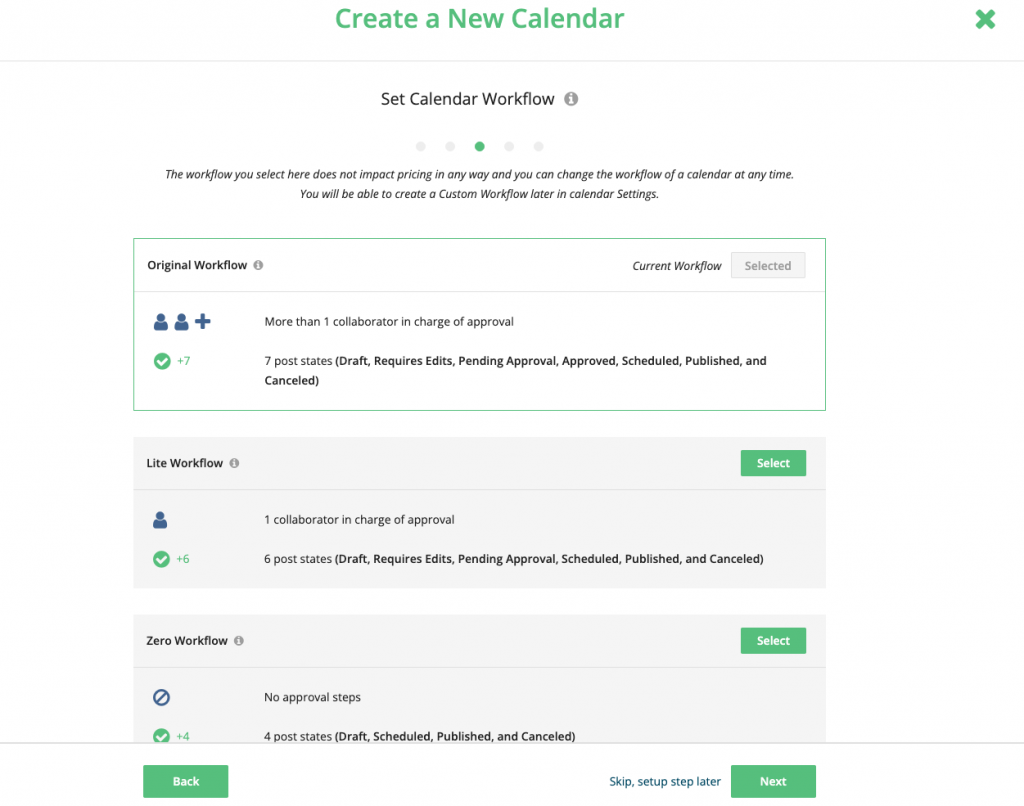
Loomly also allows you to create custom workflows using assignment triggers and state guards, later on, from the Calendar Settings page.
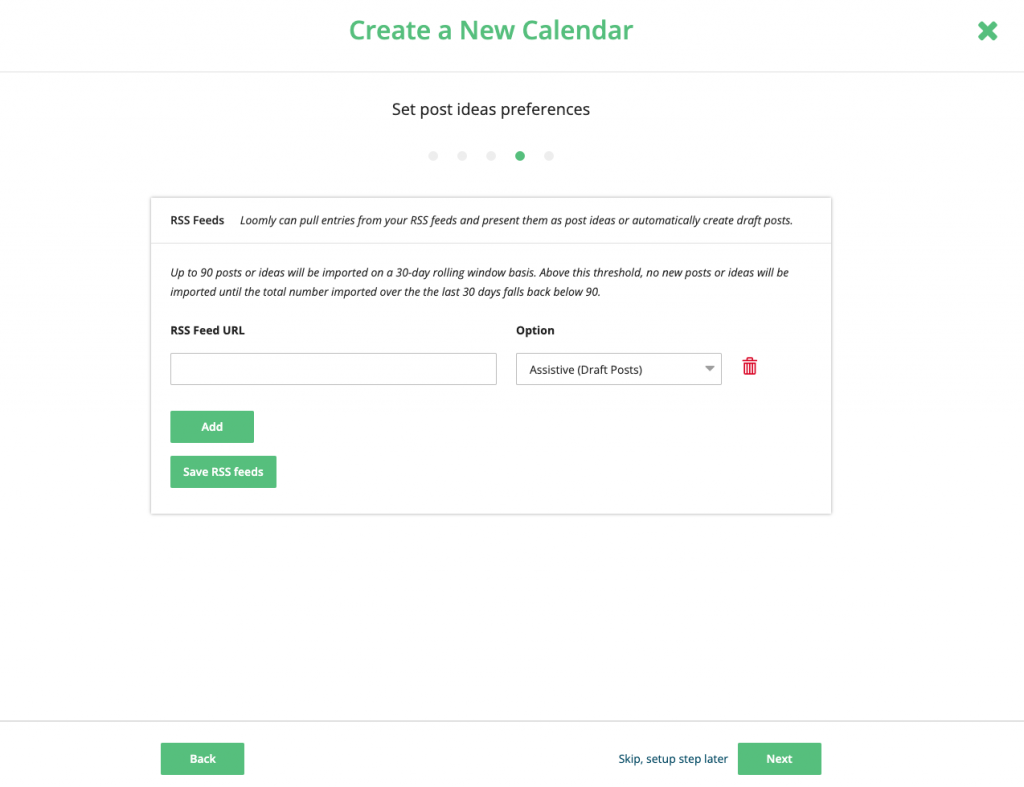
Set Post Idea Preferences
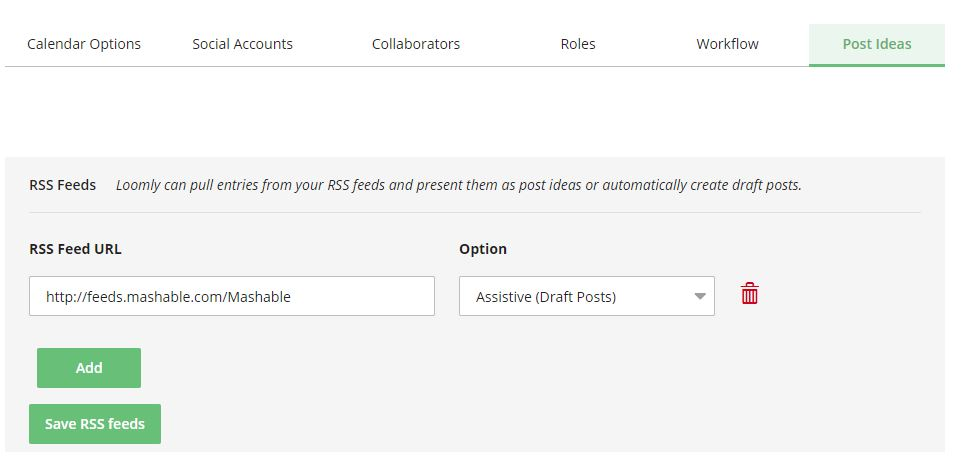
Post ideas are pulled from any RSS feed and added as ideas or automatically created as draft posts that you can tweak and publish.
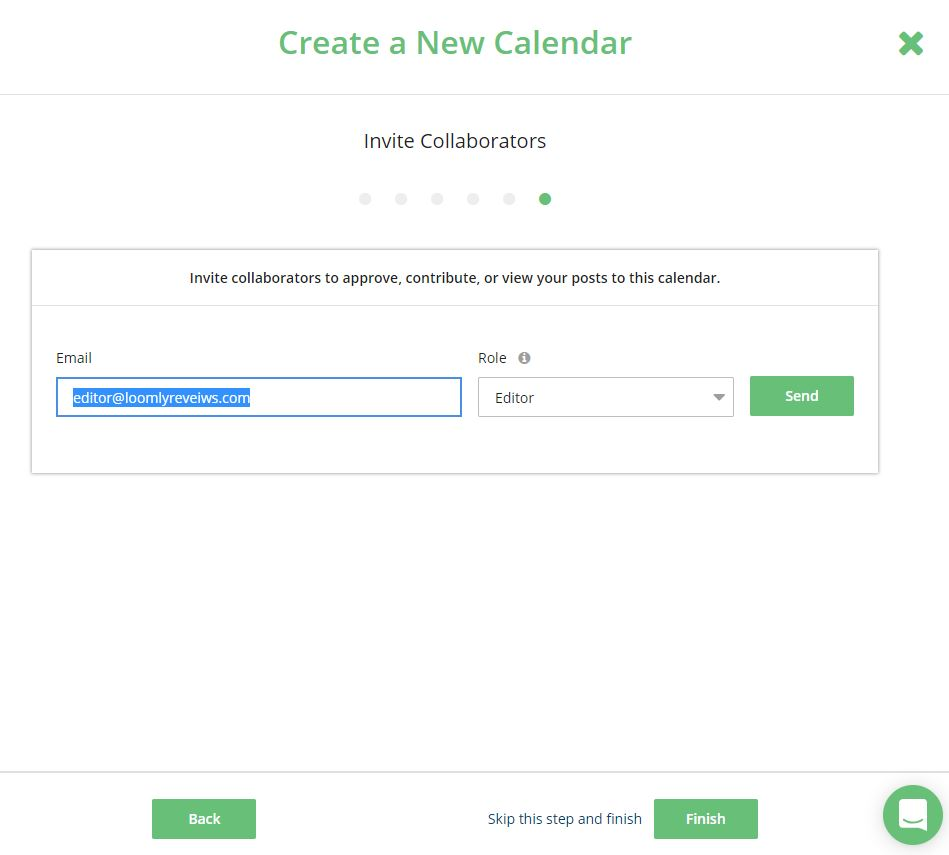
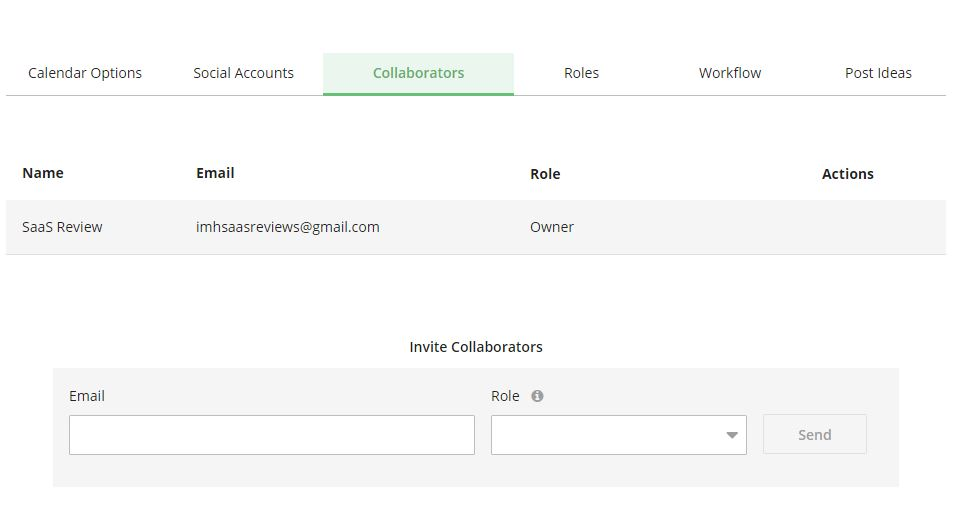
Invite Collaborators
The final step in the calendar creation process is inviting collaborators. It’s a simple process handled through email. Simply enter the email address of a team member, assign a role and click send.
Creating a Post
The power of Loomly’s workflows begins to show in the post creation process. You’re presented with a total of 5 steps for posts, with a 6th should you want to boost a published post on Facebook
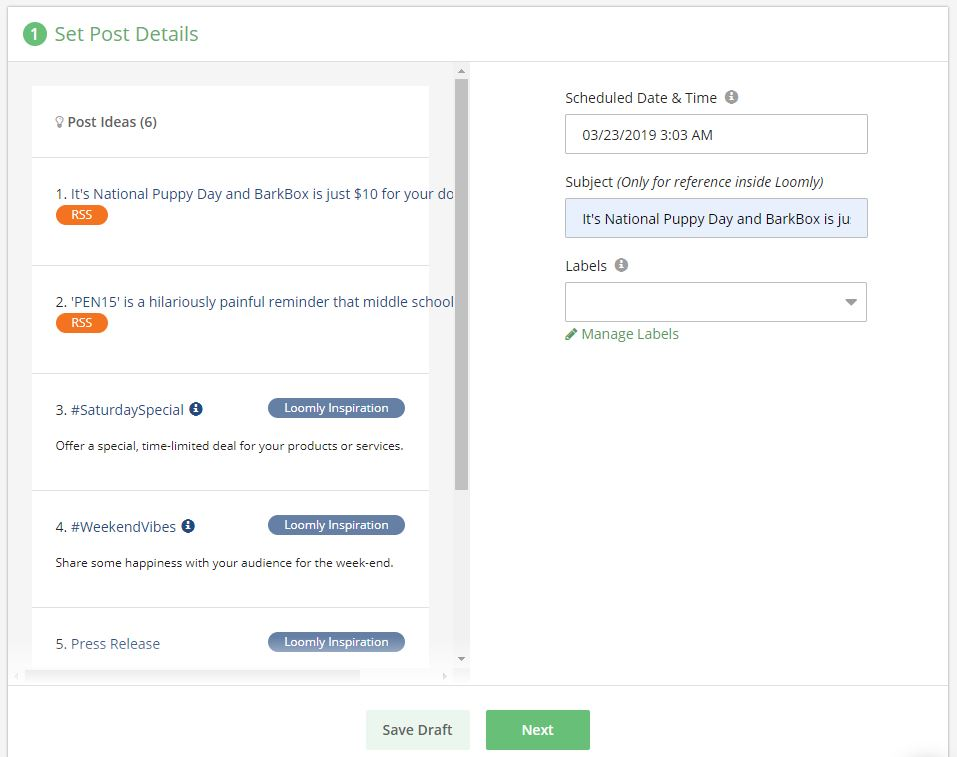
Step 1: Set Post Details
You can set a generic date & time for your post, which will apply to all your channels. You can take advantage of Loomly’s Scheduling Slots feature to set your preferred publishing schedule and save time when creating new posts in Post Builder.
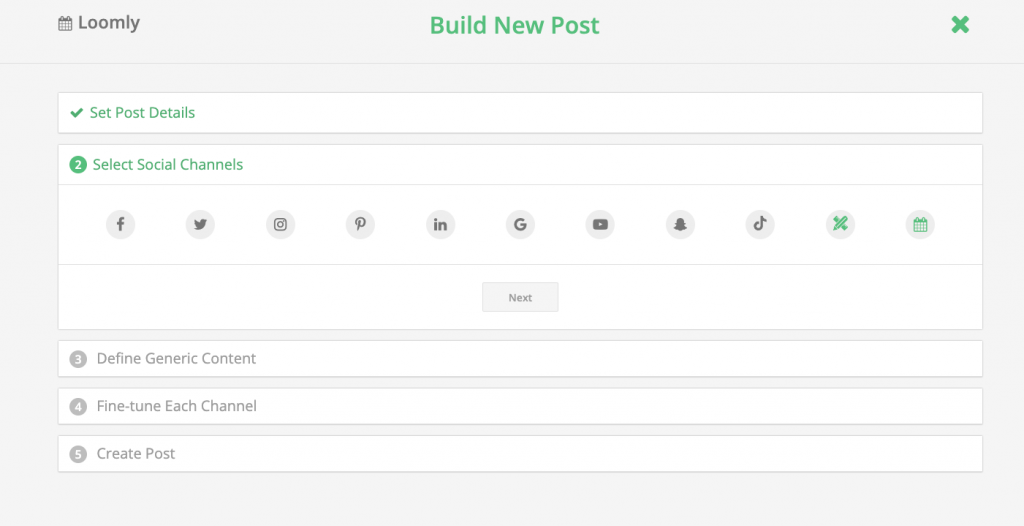
Step 2: Select Social Channels
Social channels appear greyed-out. Selecting Pinterest will require that you select the board you’d like your post to appear on.
Step 3: Define Generic Content
In step 3, you’ll need to enter what Loomly calls ‘base’ content. This is content that you’ll be able to tweak for each platform in step 4. Here, all long URLs are also shortened and assigned a Loom.ly URL which can later be tracked to produce analytics on each post. You can also upload media files, a hashtag manager and more.
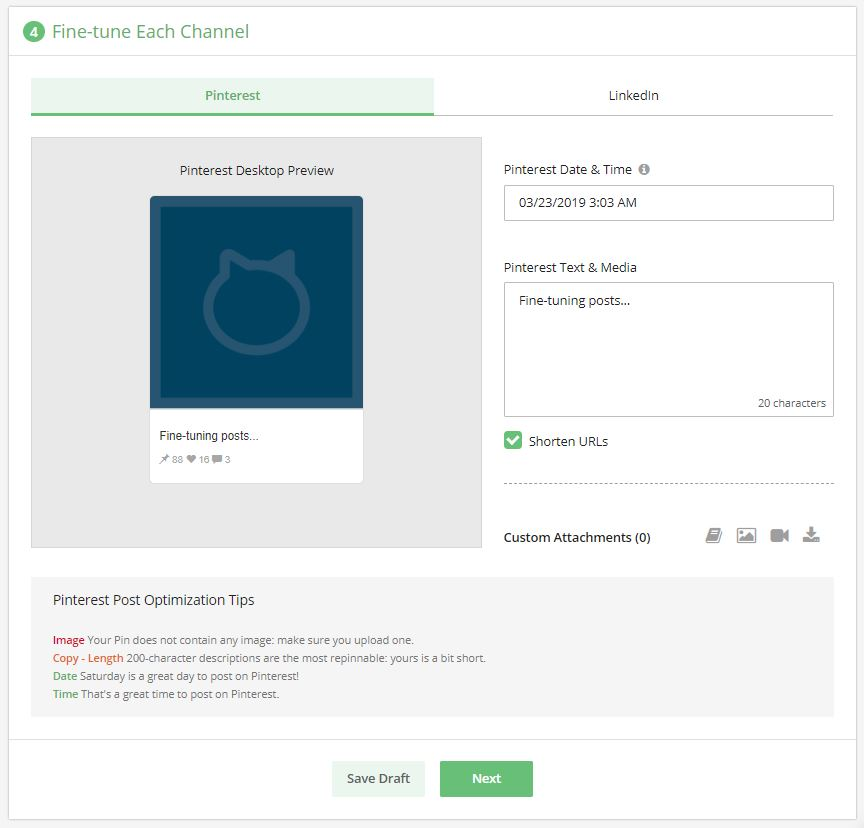
Step 4: Fine-Tune Each Channel
In step 4, you’ll be able to fine-tune your post for each social media channel. Loomly provides a helpful set of tips for each platform to help optimize image size, copy length, and which day and time to publish your post.
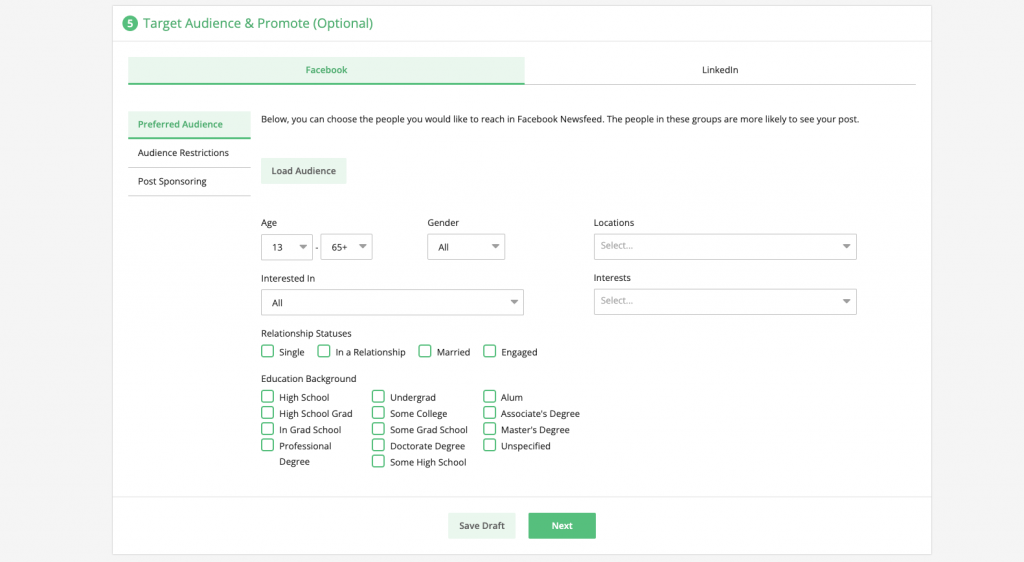
Step 5: Target Audience & Promote - Facebook and LinkedIn (Optional)
Typically there are 5 steps of the standard post creation process, however, if you’ve connected and selected your Facebook or LinkedIn account for post publishing, you’ll be presented with this step. In this step, you’ll be able to choose your audience, include additional restrictions (a minimum age and countries that should not see your post) and assign a budget for the duration of your campaign.
Dashboard
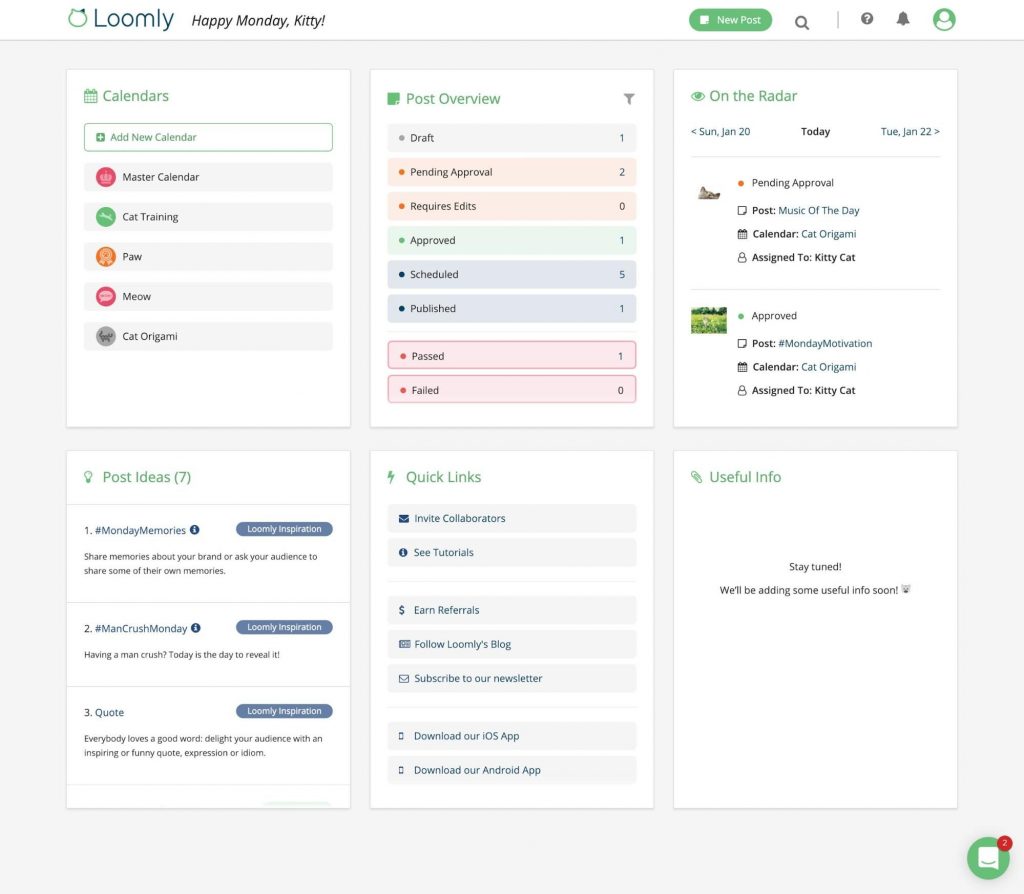
Creating an easy-to-use interface isn’t so easy to do, but we think that Loomly’s managed the feat quite well. Their main dashboard provides 6 cards that include everything you’ll need to manage your social media accounts.
Cards include:
- Calendars - a list of all calendars you’ve created
- A post overview - a snapshot of posts segmented by workflow states you’ve chosen, including ‘passed’ or ‘failed’ states
- On the Radar - a snapshot of posts recently managed
- A post idea feed
- Quick links
- Blog articles
Views
Loomly offers users 3 views, namely the calendar, list and post view (all accessible from the top navigation menu). Here’s a look at each view:
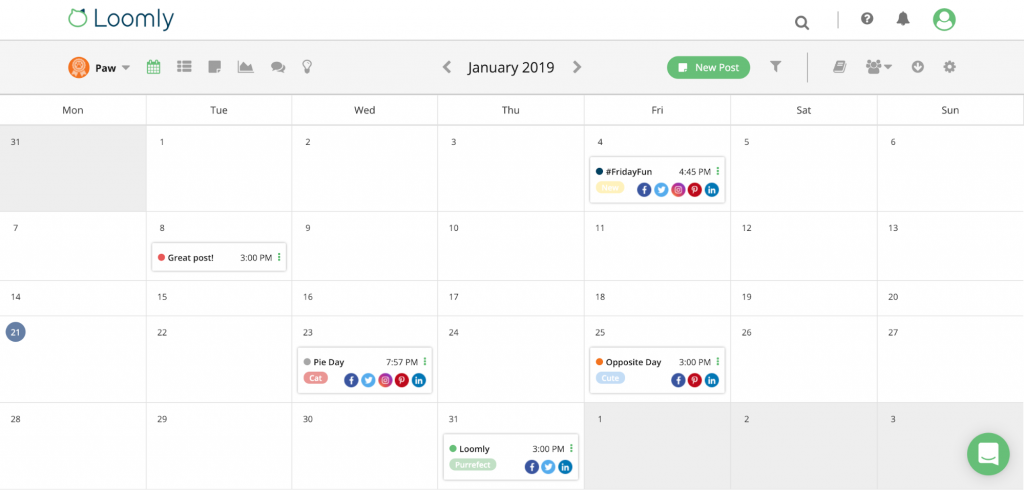
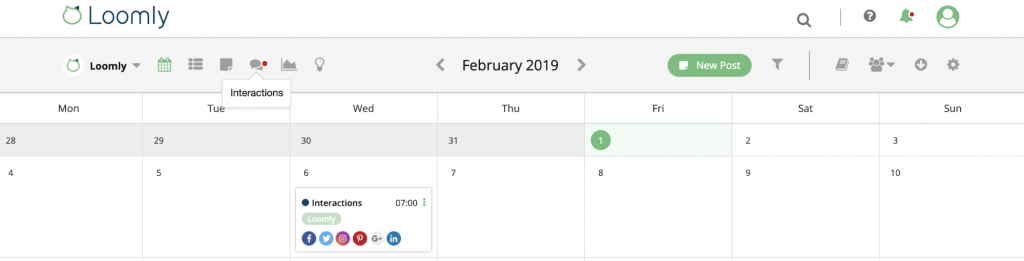
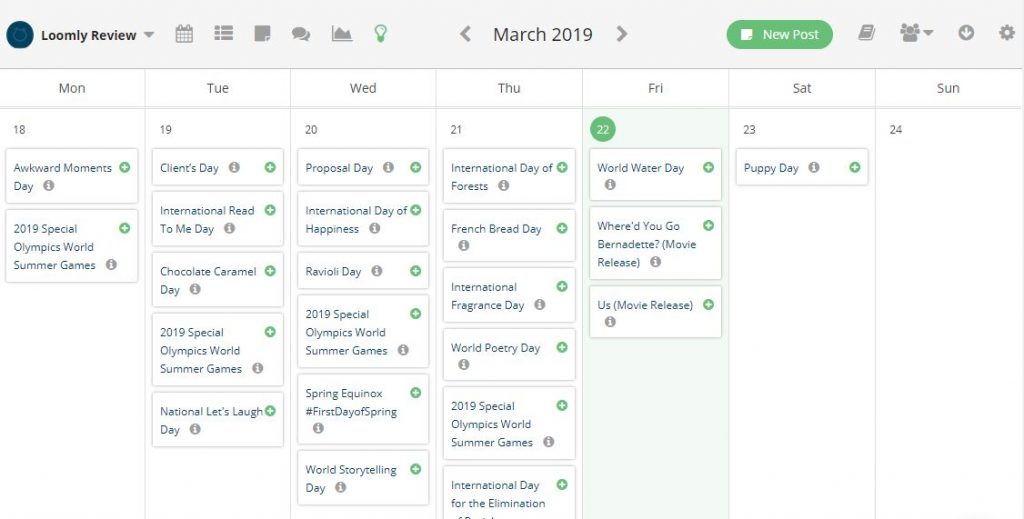
Calendar
The calendar view shows all posts spread over the period of a calendar month.
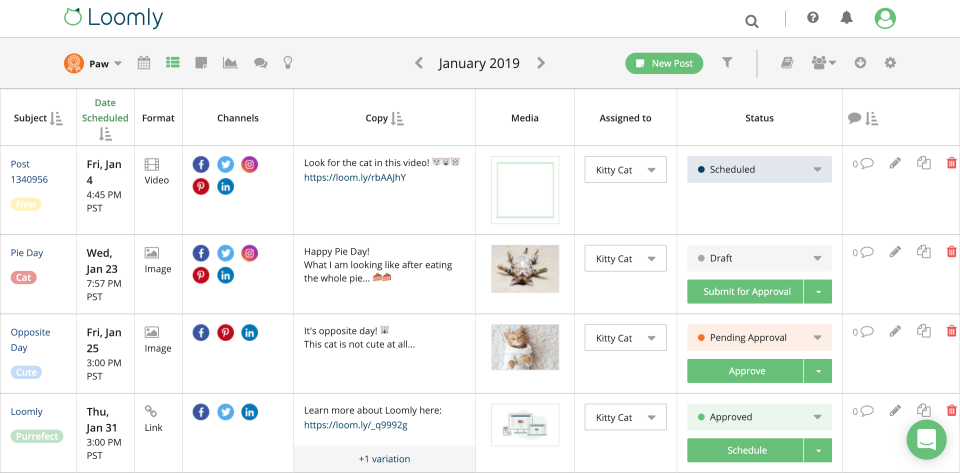
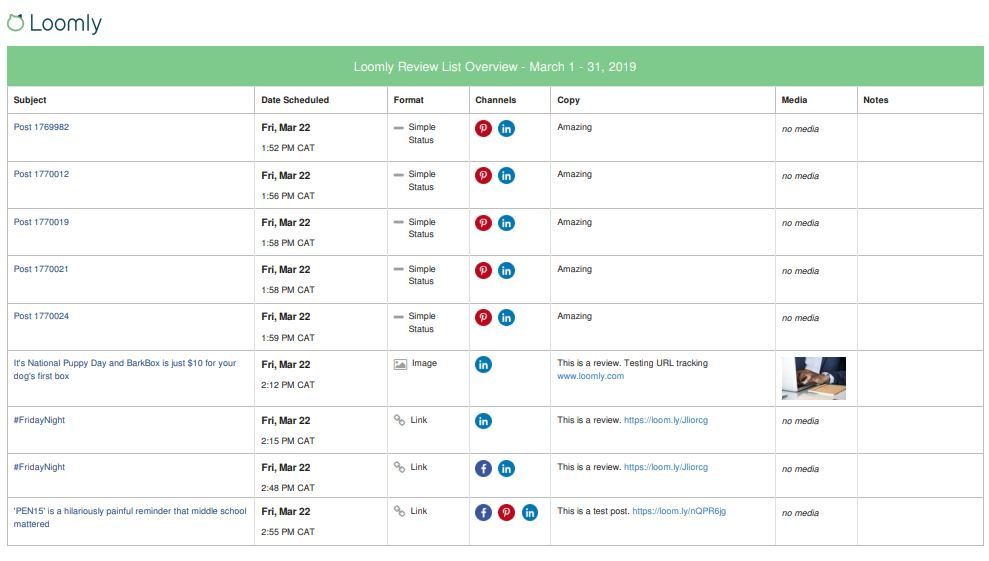
List
List view displays all posts as a list and includes the following information for each:
- Subject (for internal use)
- Date schedules (sortable)
- Format (simple status, image, link)
- Channels (social media platforms)
- Post copy
- Media (attached/included)
- Status of the post (pending approval, requires edits, approved, scheduled)
- An option to view comments (including a count of comments received)
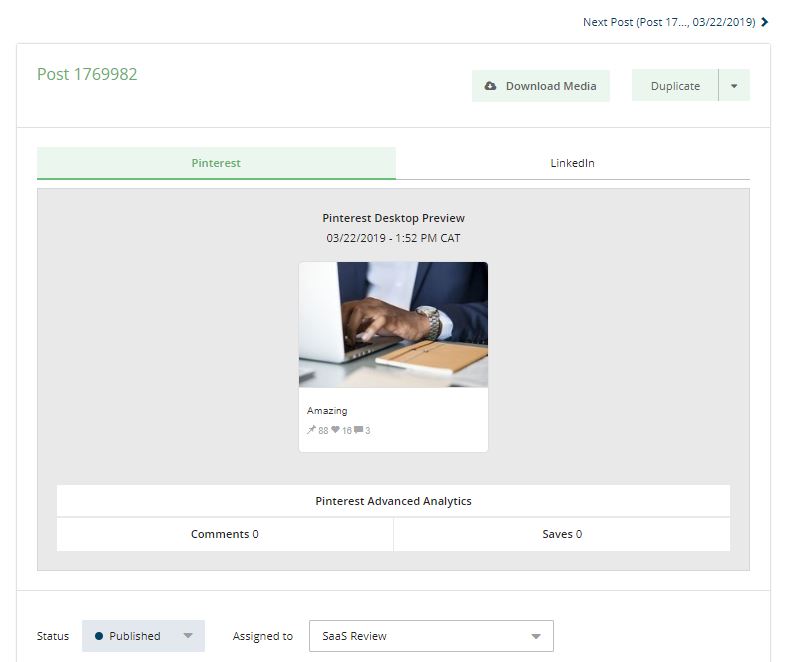
Post
Post view gives you the option of examining individual posts. You can:
- View images and media associated with a post (by social account type)
- See the copy used (by social account type)
- View the post timeline (creation through to publish date and time)
- See analytics (by social account type)
- Make comments for team members to review (not published to social accounts) and keep them private from clients if necessary
Interactions
You can efficiently manage interactions with your team by assigning states, assigning collaborators, filtering interactions by assignee, and creating saved replies.
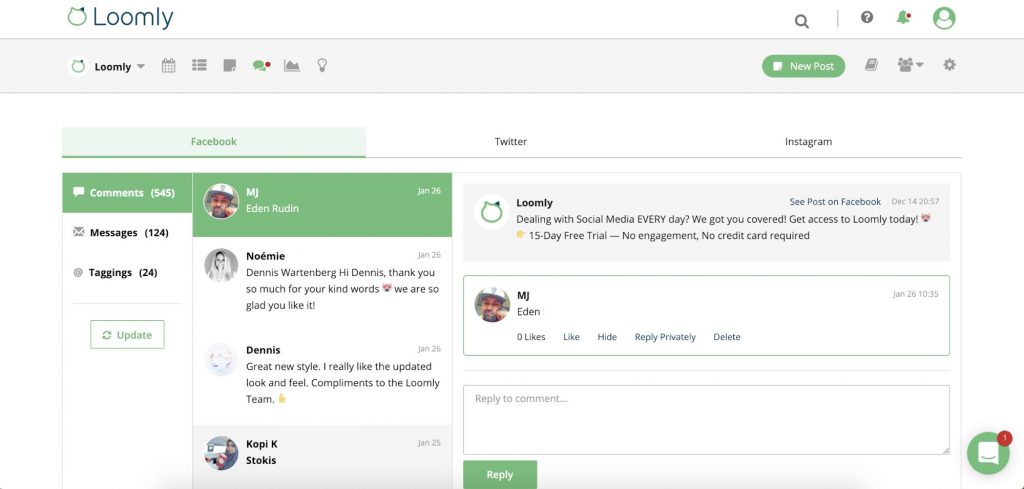
Interactions are also accessible, not only through the calendar view, but on the toolbar of all pages.
Analytics
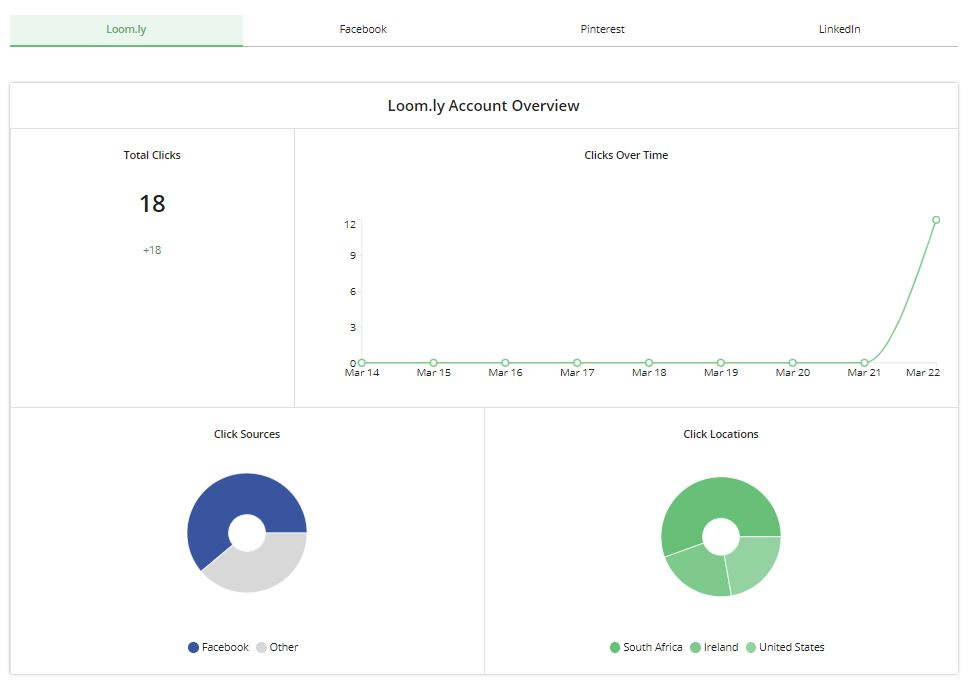
Analytic features are what we’ve all come to expect from almost every web-based tool. Loomly does a good job aggregating stats that you’ll find very helpful. Analytics are available for most social accounts you’ve connected and also via a Loomly main dashboard which includes an overview.
On the main dashboard you’ll be able to see:
- The total number of clicks across all posts and social platforms
- Click sources (social channels that clicks came from)
- Click locations (countries clicks came from)
Loomly also provides detailed link metrics in a table below the main dashboard. The ability to track link clicks is made possible by Loomly’s URL shortener. When used, your original URL is replaced with a shortened Loom.ly URL.
Note: when using Loom.ly links in posts, ensure that you remove original links and add any images you need as attachments. This will ensure that your post clicks are all related to the short URL and therefore trackable.
In the table, Loomly displays the post creation date, the original and shortened URL, a number of clicks the link received and which country the clicks came from (with volume).
If there was an additional feature we’d look to Loomly for, it would be the inclusion of an interaction stats (think comments, tags, and messages). We think that these pieces of information would paint a more complete picture of the level of engagement a brand is receiving through each social channel.

Using Post Ideas
Loomly’s post ideas feature is one we think deserves more credit than it receives. Post ideas are a collection of special events or news that Loomly pulls from the web via RSS feeds. They are also related to your pre-selected industry and can be very helpful for busy social media managers trying to come up with great content ideas.
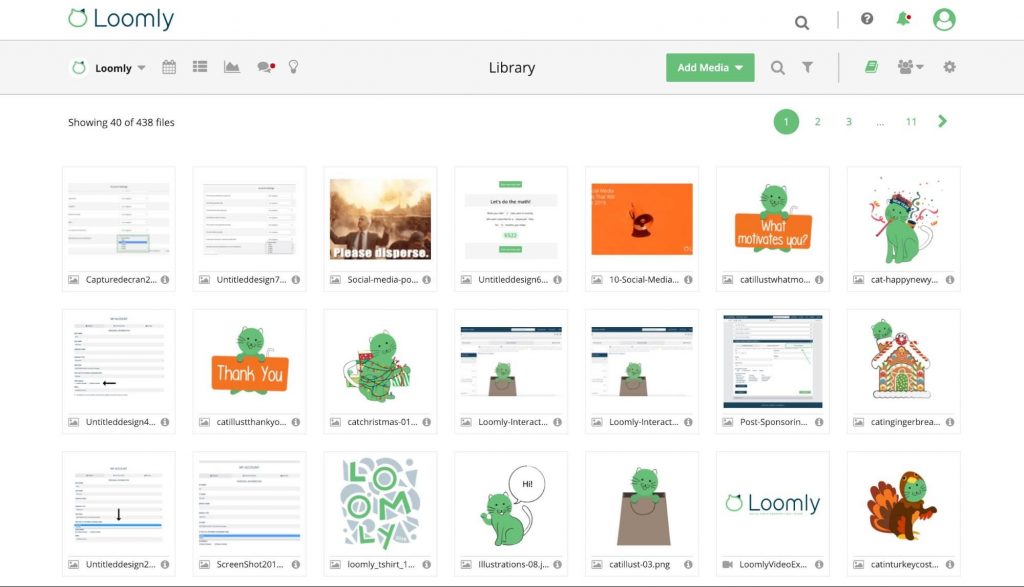
Media Library
Most social media managers work with a team of creatives and this can create a variety of challenges, such as difficulty accessing graphics from designers or the struggle to find them in an overflowing inbox, or the need to find social post links that must be included - also buried somewhere in your inbox or Slack.
Loomly’s solution is a media library. It’s a simple feature that allows you to add:
- Images
- Video
- Notes that can be imported into posts later
- Post templates
- Unsplash integration that lets you pull and save stock images, videos, and gifs.
Report Exports
Like many social media planning and management tools, Loomly also offers the ability to download reports as a .csv and PDF.
Once again, if we could ask for an additional feature, we’d want an Excel version that could be used for further reporting purposes.
Calendar Settings
Making updates to calendars is possible and to do so you’ll need to click on the settings icon in the top right-hand section of the navigation menu.
Here, you’ll be able to make updates to the following settings:
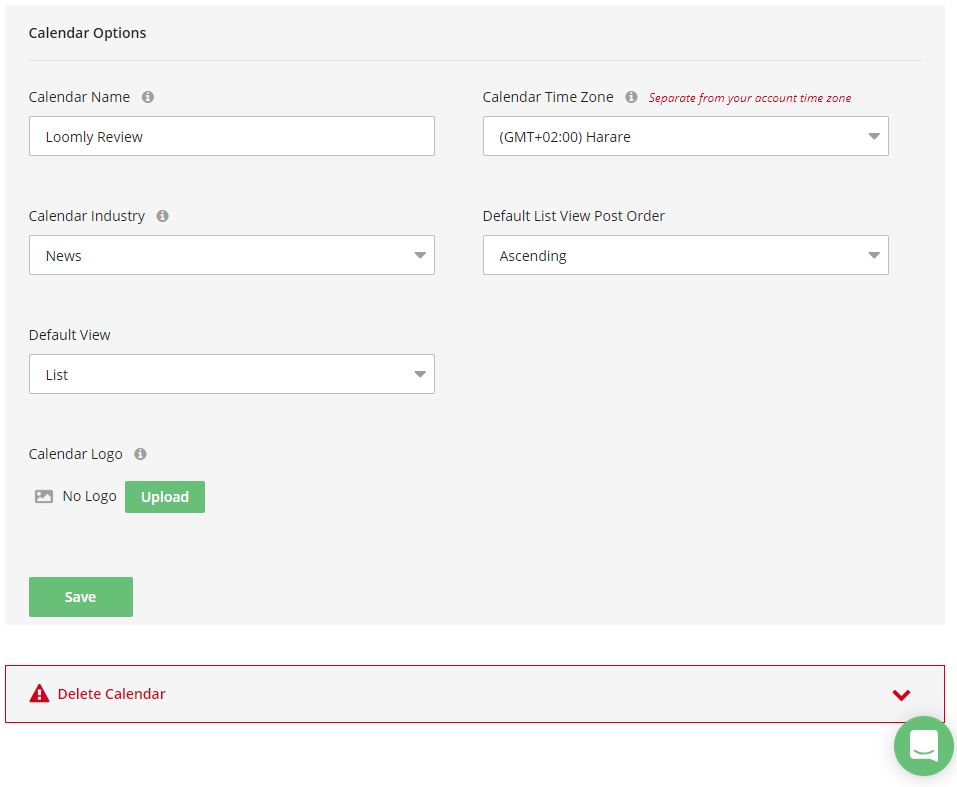
Calendar Options
Changes to your calendar can include:
- Changing its name
- Selecting a different industry
- Choosing a default view (calendar or list)
- Changing your timezone (separate from your calendar timezone)
- Upload a new logo
If need be, you’re also able to delete a calendar. Doing this will mean all posts, analytics, comments and updates from Loomly will be permanently lost.
Collaborators
Social media teams often change both internally and in client businesses. Loomly makes it possible to manage roles here, with the option of removing and adding new collaborators.
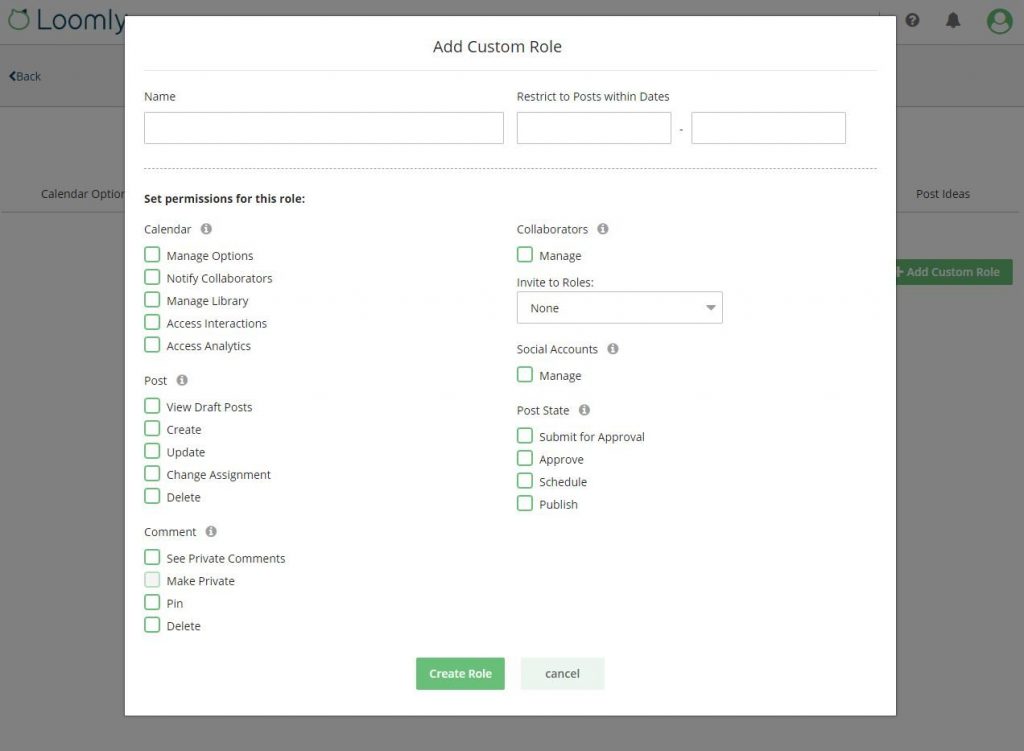
Custom Roles
In the event that you need to create a unique role for a team member or client, Loomly allows you to get very specific with the permissions you can assign your custom roles.
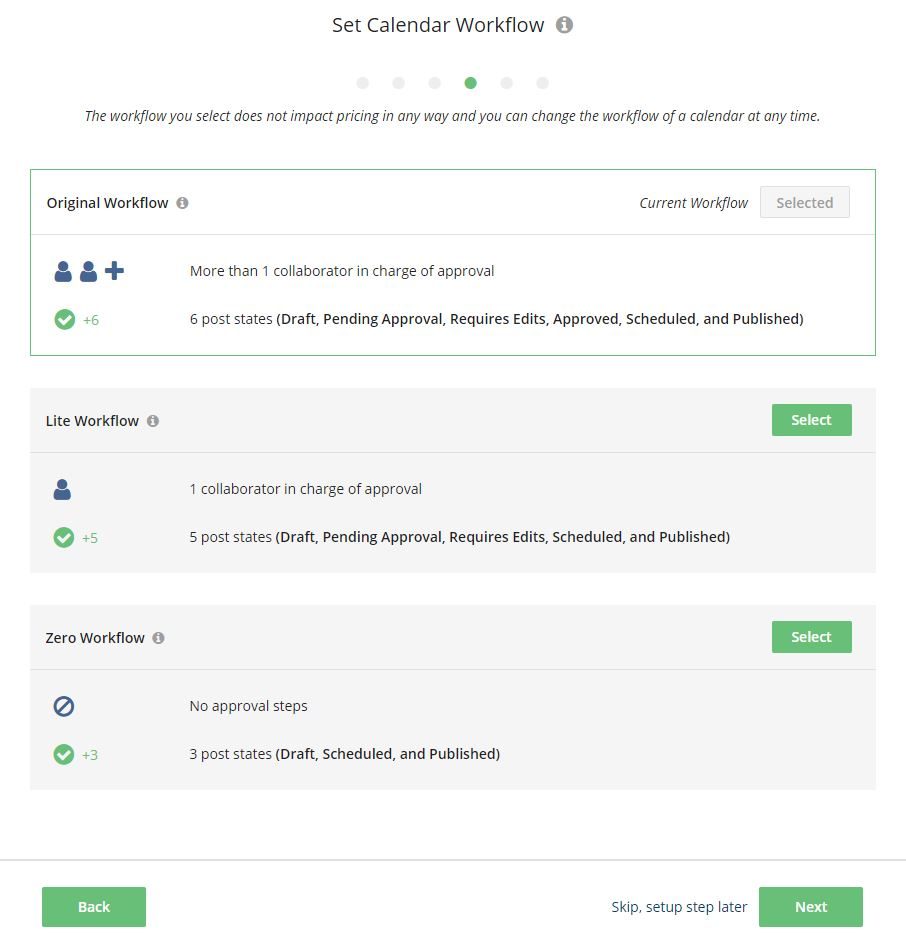
Workflows
Custom Workflows are available. Under the Workflows tab in the settings section, you’ll be presented with the 3 workflow options (Original, Lite and Zero). Changing your workflow is completed by clicking on the Select button for the workflow of your choice.
Post Ideas
Need to adjust your post ideas to add or remove any RSS feeds? Simply click on the Add button or the trash can icon.
Conclusion
Developing a social media management application is no simple feat. You need to have a firm grasp on the requirements of your group of users, requirements that are influenced by updates from each social platform, and the need to streamline processes. We think Loomly’s solution to social media planning packs all the right features and functionality that social media managers and their teams need to get the job done.
Yes, there are certain features that we’d love to see added, such as Excel report formats and more detail in analytics reports, but we’ve got a feeling that Loomly is already aware of these ideas and has them pinned on a roadmap for implementation somewhere in the near future.
Altogether, we like what Loomly’s built and think that they’ve stayed true to their goal of creating a simple and easy-to-use tool.
Frequently Asked Questions
What is Loomly?
Loomly describes itself as a brand success platform. You can use it as a single place to collaborate, publish, and measure your company's social activities. When competition for attention is fierce, and every customer is an influencer, growing an inspiring brand is a key success factor for your organization. Teams of all sizes need to embrace the processes, workflows, and tools that foster brand success. With Loomly, you can manage all your social media content — organic posts and ads — from one platform.
How much does Loomly cost?
Loomly offers a range of pricing tiers. These are monthly prices – there's a 25% discount for annual payment. The plans are:
Base - $35/mo – 2 users, 10 social accounts
Standard - $79/mo – 6 users, 20 social accounts
Advanced - $172/mo – 14 users, 35 social accounts
Premium - $359/mo – 30 users, 50 social accounts
Enterprise – contact for pricing – 51+ users, 10 social accounts
Core features and unlimited content comes with all plans. Additional enhancements are added with each higher plan.
Does Loomly post to Instagram?
Yes, with Loomly you can automatically post your content to Instagram.
How do you create a post on Loomly?
Inside a calendar, create a new post by hitting the green "New post" button. You can set a generic date and time for your post, which will apply to all your channels. You can also define a subject and apply Labels to your post. Select the social channels you want to publish your post to. Define generic copy and upload generic media files (photos & videos), which will apply to all your channels. You can also override generic content for specific channels.
What is the best social media scheduler?
It is, of course, a matter of opinion what is the best social media scheduler. We gave Loomly an overall score of 4.7 in this review. Each social media marketing platform has its strengths and weaknesses. You should compare all the products we've reviewed. Begin by looking at the pricing to eliminate any outside your budget. Then read our reviews and make a shortlist. Finally, take out a free trial on your shortlisted products to determine which is best for you.
How do you create a Loomly account?
You can enter your email on the main Loomly page. You then click on the green Get Started button. This gives you a free 15-day trial; no credit card is required. You are asked for your first name, last name, work email, and password at this point. When you create an account, Loomly immediately takes the lead and initiates a guided tutorial. Unlike most, this is a wizard you want to pay attention to because it's well-structured and very helpful.
Loomly
-
Features
-
Ease of Use
-
Support